itmc-business-os
Play Console manual steps — detailed walkthrough
This is a click-by-click reference for the one-time, human-only Play Console setup described in PUBLISHING.md (“What is — and isn’t — automatable”). Use it if the app is stuck in draft status and the publishing overview checklist needs to be worked through by hand.
None of this can be scripted or automated — Google requires a human in the Play Console UI for these legal/policy declarations, regardless of tool.
Store listing content (icon, screenshots, descriptions) — already automated
Before the manual steps below: the store listing content itself — title, short/full description, icon, feature graphic, and screenshots — is not part of this manual walkthrough, because it’s already fully scripted and pushed automatically by Fastlane on every release. Nothing below asks you to type these into the Play Console UI by hand.
| Content | Where it lives | How it’s produced |
|---|---|---|
| Title / short & full description | fastlane/metadata/android/en-US/title.txt, short_description.txt, full_description.txt |
Hand-written once, edit the .txt file directly for changes |
| Changelog (release notes) | fastlane/metadata/android/en-US/changelogs/<versionCode>.txt |
One new file per release, plain text |
| Icon + feature graphic | fastlane/metadata/android/en-US/images/icon.png, featureGraphic.png |
scripts/generate_placeholder_graphics.ps1 (swap for real art anytime, same filenames) |
| Screenshots | fastlane/metadata/android/en-US/images/phoneScreenshots/ |
scripts/capture_screenshots.sh — drives the running app via adb/accessibility tree, no manual screenshotting |
Editing any of these and pushing a release tag re-uploads them automatically — see PUBLISHING.md. The only thing to verify by hand, once, is that the Store listing page in Play Console (Grow users → Store presence → Store listings) actually shows this content after the first upload — see step 3 below for what “looks complete” means.
0. Prerequisite check
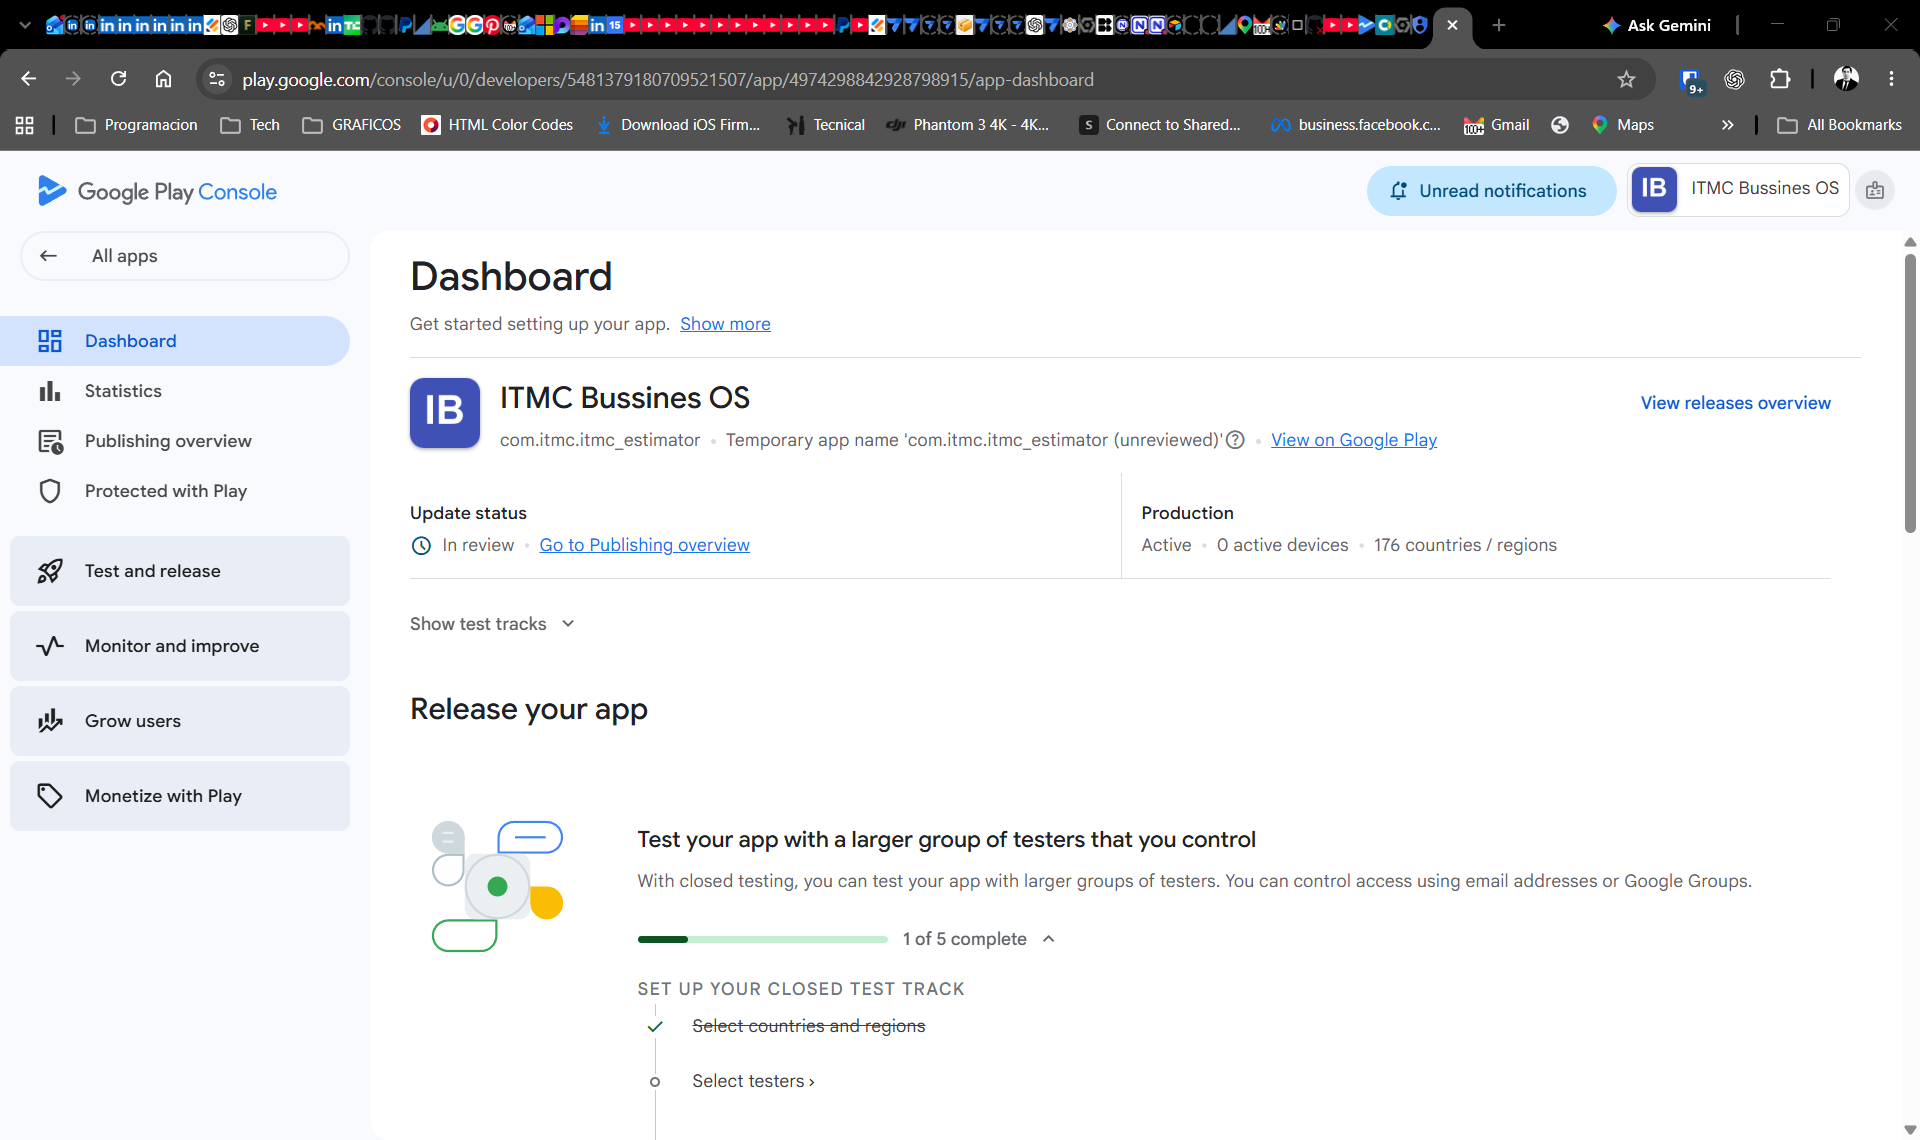
Open Dashboard (left nav) first — it shows a checklist with locked/unlocked steps for what’s still blocking the app out of draft status. Note the “Temporary app name ‘… (unreviewed)’” tag next to the package name — that’s normal for a draft app and persists until Google finishes reviewing a submitted release, it isn’t itself a blocker:
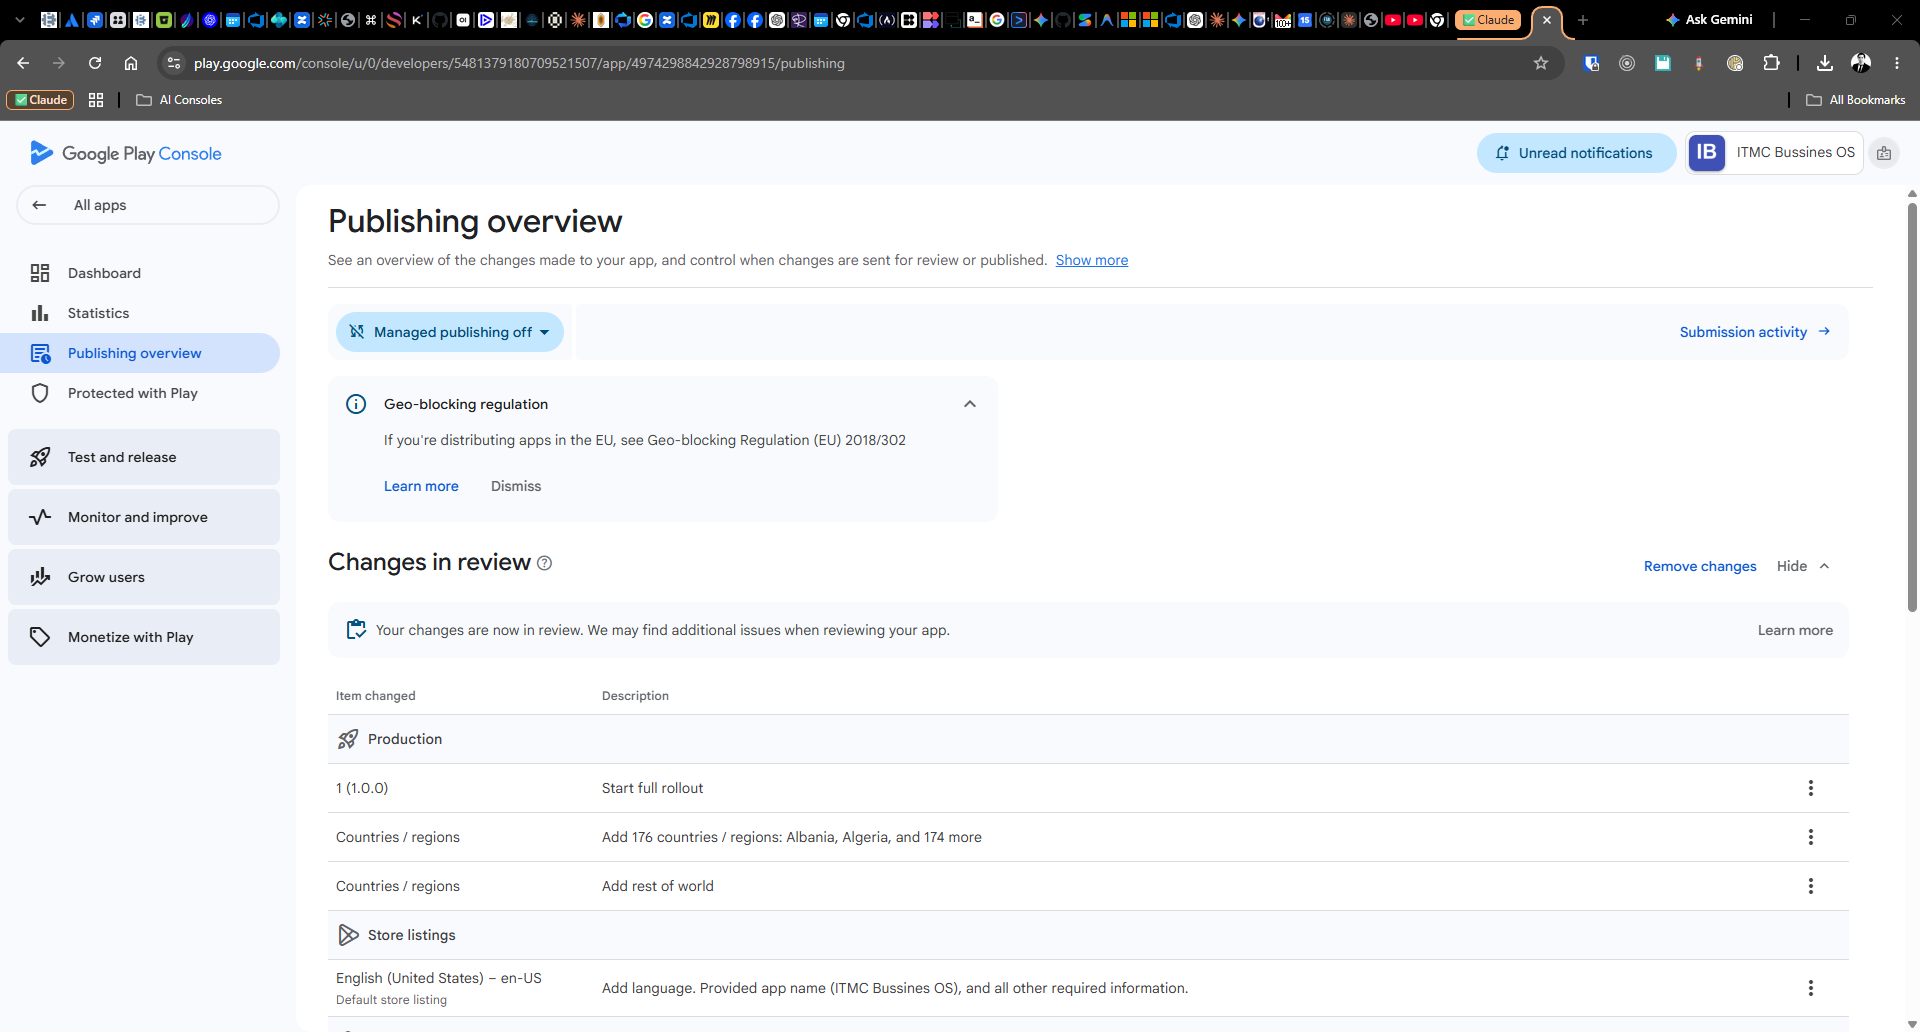
Publishing overview (left nav) lists every pending change grouped by area (Store listings, App content, Store settings, Production/Testing tracks); its “Send app for review” button stays disabled until the Dashboard’s required steps are complete. Once changes are submitted, this same page shows a “Changes in review” section listing exactly what was sent — production release, countries/regions, store listing, etc:
1. Internal testing — add testers
Path: Test and release → Testing → Internal testing → Testers tab
- Click Create email list.
- Fill in:
- List name (free text, e.g. “Internal Testers”)
- Add email addresses — type an address, press Enter to add it to the list (repeat for multiple). Comma-separated also works.
- Click Save changes → confirm in the “Create email list?” dialog by
clicking Create.
- This save can fail transiently (“Your changes couldn’t be saved”, red icon next to the email, list silently emptied). If that happens, re-enter the email(s) and click Save again.
- Back on the Testers tab, make sure the new list’s checkbox is ticked, then click Save (bottom right) to attach that list to the internal testing track. A “Changes updated” toast confirms it, and the track summary flips from “Inactive” to “Active”.
Not required to publish to production — it’s an optional early-testing track. Whose email(s) to use is a call for the app owner, not something to guess.
2. Production track — select countries/regions
Path: Test and release → Production → Countries / regions tab
- Click Add countries / regions.
- A table of every country appears with “Not targeted” status and a header checkbox. Click the header checkbox to select all countries/regions in one action, or hand-pick specific ones.
- Click Save (bottom right). A dialog offers “Go to Publishing overview” — click Not now if there are more steps to do first, or Go to overview if this was the last one.
Which countries/regions to release in (worldwide vs. a specific list) is a business decision for the app owner.
3. App content — Content ratings questionnaire
Path: Monitor and improve → Policy and programs → App content → “Need attention” tab → Content ratings → Edit declaration
This is the IARC questionnaire, and the one declaration Google requires resubmitted whenever it shows “In progress” / incomplete, even if a prior rating exists. Other declarations (Data safety, Target audience, Ads declaration, Health apps, Financial features, Government apps, Advertising ID) are usually already filled in from a previous session — check the Actioned tab first before redoing any of them. Exact answers for this project are in store-listing-answers.md.
Step 1/3 — Category:
- Enter a contact Email address (shared with rating authorities).
- Pick a Category radio: Game / Social or Communication / All Other App Types. Business/utility/productivity apps → “All Other App Types”.
- Check “I agree to the Terms of Use”.
- Click Next.
Step 2/3 — Questionnaire: a sequence of Yes/No radio questions grouped under headers (varies by category). For “All Other App Types” the groups are: Downloaded App, User Content Sharing, Online Content, Promotion or Sale of Age-Restricted Products or Activities, Miscellaneous (includes a “shares precise location with other users” question that’s easy to miss, since it’s the first item under Miscellaneous — scroll back up and confirm every group shows a green “Completed” tag before proceeding).
- For a plain business/utility app with no mature content, no gambling, no user-generated content/chat, and no location-sharing between users, every question is answered No.
- The Next button stays disabled until every question is answered. Click Save first if Next still looks greyed out — saving unlocks it.
Step 3/3 — Summary: shows the resulting age rating per territory (e.g. “All ages” for Brazil/ClassInd, etc.). Review it makes sense, then click Save → confirm “Go to Publishing overview” if ready, or Not now.
Category selection and the mature-content Yes/No answers are factual claims about the app that drive an official age rating — confirm with the app owner rather than assume.
3b. App content — Target audience, Data safety, Ads, Health apps
Path for all of these: Monitor and improve → Policy and programs → App content. Each declaration listed there is either “Not started”, “In progress”, or already shows a green check from a prior session — check the Actioned tab first, since these don’t need to be redone once complete. Exact answer for every question, based on what this app actually does, is in store-listing-answers.md — this section is only the click path, not the answers.
Target audience and content (App content → Target audience):
- Click Start / Edit declaration.
- Select the target age group(s) — a business/utility app selects the adult range, not “designed for children”.
- Answer the “Is your app designed to appeal to children?” question per the answer key.
- Click through the remaining pages (Next) and Save at the end.
Data safety form (App content → Data safety):
- Click Start / Edit declaration.
- First page: “Does your app collect or share any of the required user data types?” — this is the gate question; answering per the answer key here determines whether the rest of the form even asks about specific categories (location, personal info, financial info, etc.).
- If the form still lists data-type categories individually, go through each and answer per the answer key.
- A later page asks about encryption in transit and a data-deletion mechanism — answer per the answer key.
- Final page is a Preview of the data safety section as it’ll appear on the store listing — review, then Submit / Save.
Ads declaration (App content → Ads):
- Click Start / Edit declaration.
- Answer “Does your app contain ads?” per the answer key.
- Save.
Health apps declaration (App content → Health):
- Click Start / Edit declaration (this declaration doesn’t always appear for every app category — if App content doesn’t list it, it doesn’t apply and there’s nothing to do).
- Answer whether the app is a health app / collects health data per the answer key.
- Save.
Each of these declarations shows in Publishing overview under “Changes not yet submitted for review” (or “Changes in review” once submitted) alongside the content rating, countries, and release changes — they all get sent together when you submit changes for review in step 5.
4. Production track — create the release
Path: Test and release → Production → Releases tab → Create new release
- Under App bundles, either:
- Upload a new
.aab(this is what the GitHub Action does instead), or - Add from library to reuse a bundle already uploaded to another track (e.g. the one uploaded to Internal testing) — select it via its checkbox → Add to release.
- Upload a new
- Under Release details:
- Release name auto-fills from the bundle version; leave as-is or edit.
- Release notes: the box comes pre-seeded with
<en-US>/ placeholder text /</en-US>tags. Replace only the placeholder line (triple-click it to select, then type) — be careful not to delete the closing</en-US>tag onto the same line; if that happens, click right before</en-US>and press Enter to put it back on its own line. The helper text below should read “Release notes provided for 1 language” with no red tag error.
- Click Next → lands on Preview and confirm, which should show a green “Ready to release” banner.
- Click Save → confirm “Go to Publishing overview” (or Not now).
This is the point of no return before Google review — always get explicit confirmation from the app owner before saving/submitting a real production release.
5. Publishing overview — submit for review
Path: Publishing overview (left nav)
- Once every blocking item is resolved, the button in the “Changes not yet submitted for review” section changes from disabled/”Send app for review” to an enabled “Submit N changes for review”.
- Click it → a “Send N changes for review?” dialog appears (review is typically completed within 7 days per Google, can take longer).
- Click Send changes for review.
- The section header flips to “Changes in review”, and Google runs an automated pre-check first (“Running quick checks for commonly found issues”) before the changes actually enter human review.
This is the actual publish trigger — always get explicit confirmation from the app owner before this step. After Google approves, the app goes live automatically if “Managed publishing” is off (shown at the top of this page); if it’s on, there’s one more manual “Publish” click required after approval.
Quick reference — left nav paths used
- Dashboard: top-level checklist / entry point
- Test and release → Testing → Internal testing (Releases / Testers tabs)
- Test and release → Production (Release dashboard / Releases / Countries regions tabs)
- Monitor and improve → Policy and programs → Policy status / App content
- Grow users → Store presence → Store listings / Store settings
- Publishing overview (top-level, shows aggregate pending changes and the final submit button)
Decisions that need the app owner, not automation
- Tester email addresses for internal/closed testing
- Countries/regions to release in
- Content rating category + all mature-content questionnaire answers
- Release notes wording
- Final go-ahead to save a production release and to submit for review